

This tutorial is in beta; you have been warned.
Ever wished you could have your favorite programs on every computer you use? Want your perfectly curated set of browser extensions no matter where you go?
Well now you can, with the power of shoving a full Linux distro onto a USB stick/external hard drive!
Disclaimer: USB flash drives have a limited number of times they can be rewritten, and depending on the number cycles your device can handle, installing a full Linux distro may cause it to fail faster if you install and uninstall stuff/get updates a lot. Basically, ** make backups! ** People using external hard drives should be fine, as they are intended to be rewritten a lot.
Disclaimer 2: this will only work on computers that allow USB boot, so some Chromebooks, and computers with a BIOS password may not allow you to boot from USB. Also, I am not responsible for people freaking out when they see their computers have completely different OSes on them. (Live USB booting is not permanent and will not store anything on their computer unless make it).
New to Linux? Read here:
Linux is a computer bit called the kernel, which is what bridges communication between the software you use and the hardware installed on your computer. Many operating systems based on Linux have been created, and the are commonly referred to as Linux distros, GNU/Linux, or just Linux. If you're not already familiar, Linux is like Windows or macOS, except all of the code is developed publicly (Open Source) and it's completely free. Linux is loved by developers, the most common OS on servers, and it is even what Android is based on. Linux distros are generally free and Open Source, very secure against malware, and run super fast. Facebook runs on Linux. Google runs on Linux. Hopefully your code will too.
Also see here for a better explanation: http://www.techrepublic.com/article/getting-up-to-speed-with-the-linux-desktop-operating-system/
Okay, now that those are out of the way time to get started:
What even is a persistent Linux USB?
A persistent Linux USB is a normal Linux distro installed normally to your USB drive. Unlike a live Linux USB, persistent USB drives will keep any changes you make. That means you can save documents, install programs, browser extensions, etc. This is highly useful if you want to have to have some specific program or feature (VPN, terminal access, etc) that you wouldn't normally have on a public computer, plus you won't be vulnerable to many of the common Windows viruses out in the wild.
What you need:
First off, you will need three things to make a persistent Linux USB:
- A computer you are the admin on, running Linux, Windows, etc.
- A USB drive big enough to install a distro of choice that you don't mind wiping.
- An ISO image of the distro. I recommend Lubuntu, as it only takes ~3 GB to install and is insanely fast. Linux mint is really good if you like Windows 7's user interface. (Choose the Xfce version for slow computers)
- Some software to create live USBs that supports persistence (more on this later)
- Please note if you are planning on running this on a computer with only an Nvidia GPU, you may experience problems unless you use an LTS version of Lubuntu.
-Alternatively you could use a distro designed to be run on a flash drive like Puppy Linux (use the Slacko version). If are going to use Puppy Linux, . follow Steps one and two, but ignore everything about persistence (Puppy makes your flash drive persistent automatically). I do not recommend puppy, because the distro is very limited, relatively insecure, and has a terrible UI. That said, Puppy is very small, and less likely to break a cheap flash drive from rewriting the memory cells too much.
Please note: You must get the 32-bit version of the distros to run on older 32-bit machines, but your RAM will be generally limited to under 4 GB.
Step One: Installing Your Distro To USB
This tutorial also covers how to install to USB from Ubuntu later on.
In order to create your live USB drive install Linux Live USB Creator (LiLi) or the Universal USB Installer.
If you are on Ubuntu use Unetbootin.
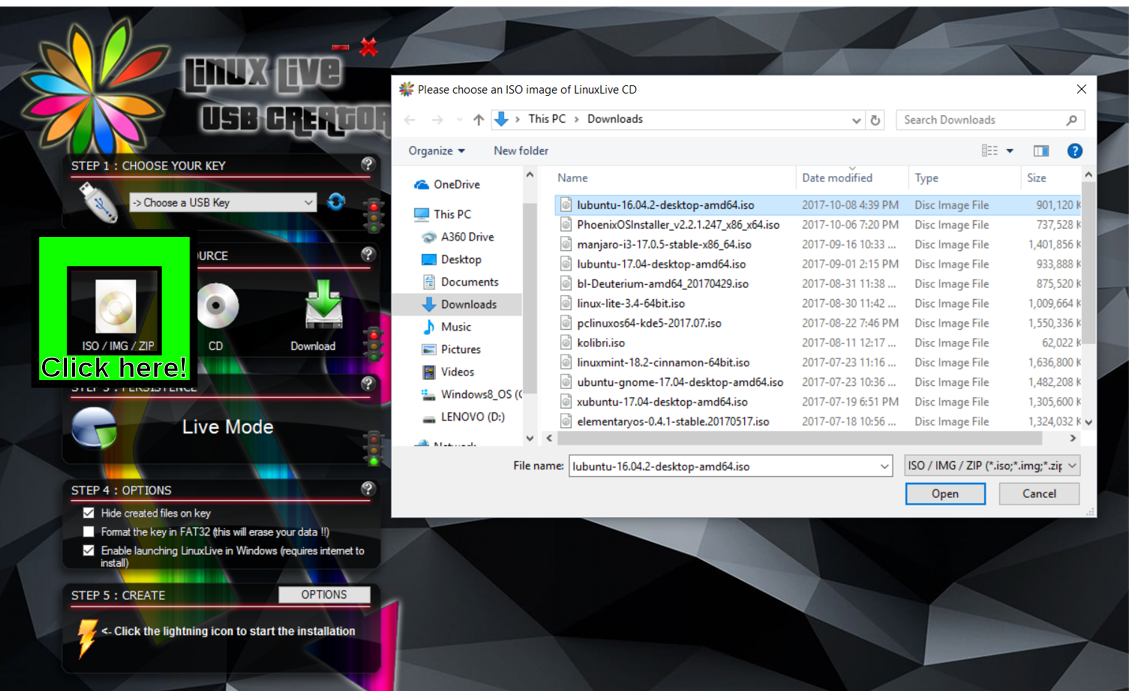
First, download your live USB maker of choice and the ISO of the distro you plan to use. For this part of this tutorial, I will be using Linux Live USB Creator, but the steps should be roughly the same for all of the above programs.
Then plug your USB drive into your computer, and format it to FAT32. (You can also format it to NTFS skip the step for going over 4 GB of storage, but this may cause issues with LiLi).
Next open your program of choice, select the USB drive you intend to use Be careful: DO NOT SELECT YOUR HARD DRIVE, that will wipe all the files on your main hard drive I also recommend unplugging all of your USB drives except for the one you are using, to avoid accidentally wiping important data.
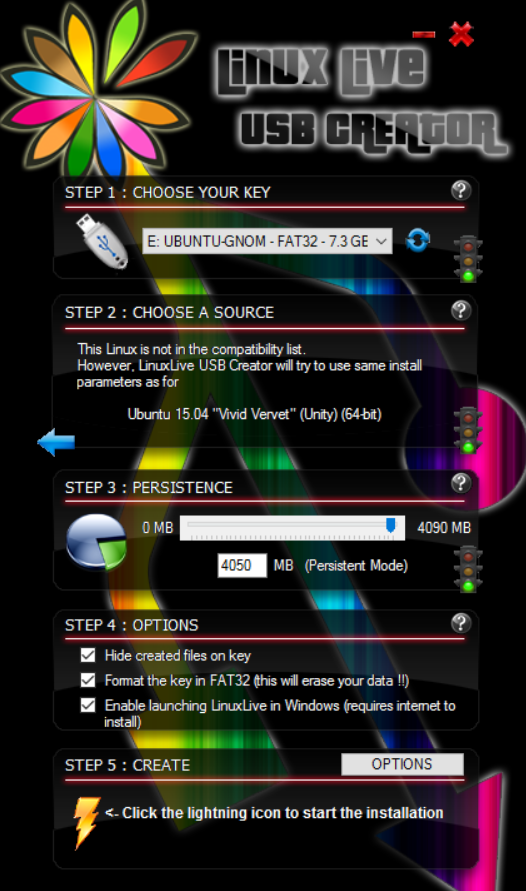
Select the ISO file you downloaded earlier, and make sure to set as much persistent storage as you want under the persistent storage option. Do not hit the download button in LiLi/UUI pressing that will redownload the ISO image, and will download an outdated version of it.
At this moment you will only be able to set 4 GB of storage, but that is normal, and is due to the FAT32 filesystem. We will fix this later. Install the ISO to your flash drive, and find something to do while it loads.
Your config should look something like this:
Please note: If you are using Unetbootin on Windows, the program will appear unresponsive, and Windows will tell you this. The installation should keep going, unless the program actually did crash. Just be patient, wait at least 20 minutes and the installation should finish.
Step Two: Booting
Insert the USB Drive into the computer you want to boot onto (you must have access to the BIOS) and set the BIOS to boot from the USB, then set it to legacy mode (unless it is so old it doesn't need one). You may also need to find a separate setting to boot from legacy mode as a primary. Most BIOSes can be accessed by pressing the F1, F2, F11, F10 or another one of the function keys during startup. (Google it for your computer if that doesn't work). After you are done with the BIOS, exit saving changes, and wait for the computer to boot. If you are greeted by a screen with boot options, and one of them is persistent, choose the option. If you do not see persistent, press F6 for more options and select persistent. If that does not work, your computer may not be compatible, or you did something wrong. If you see a screen that just says "try [name of your distro here]" or "live USB non-persistent" then it will only take to a live boot version where nothing can be saved after you power off.
To make sure you did everything correctly, make a file somewhere, and then reboot, and see if it is still there.
If it is still there: awesome!

But wait there's more:
(Optional) Step Three: Add More Than 4 GB of Storage
You will need either a computer running Linux, or a Linux live USB (non-persistent is fine) for this step. You can skip this if you used the NTFS file system earlier on.
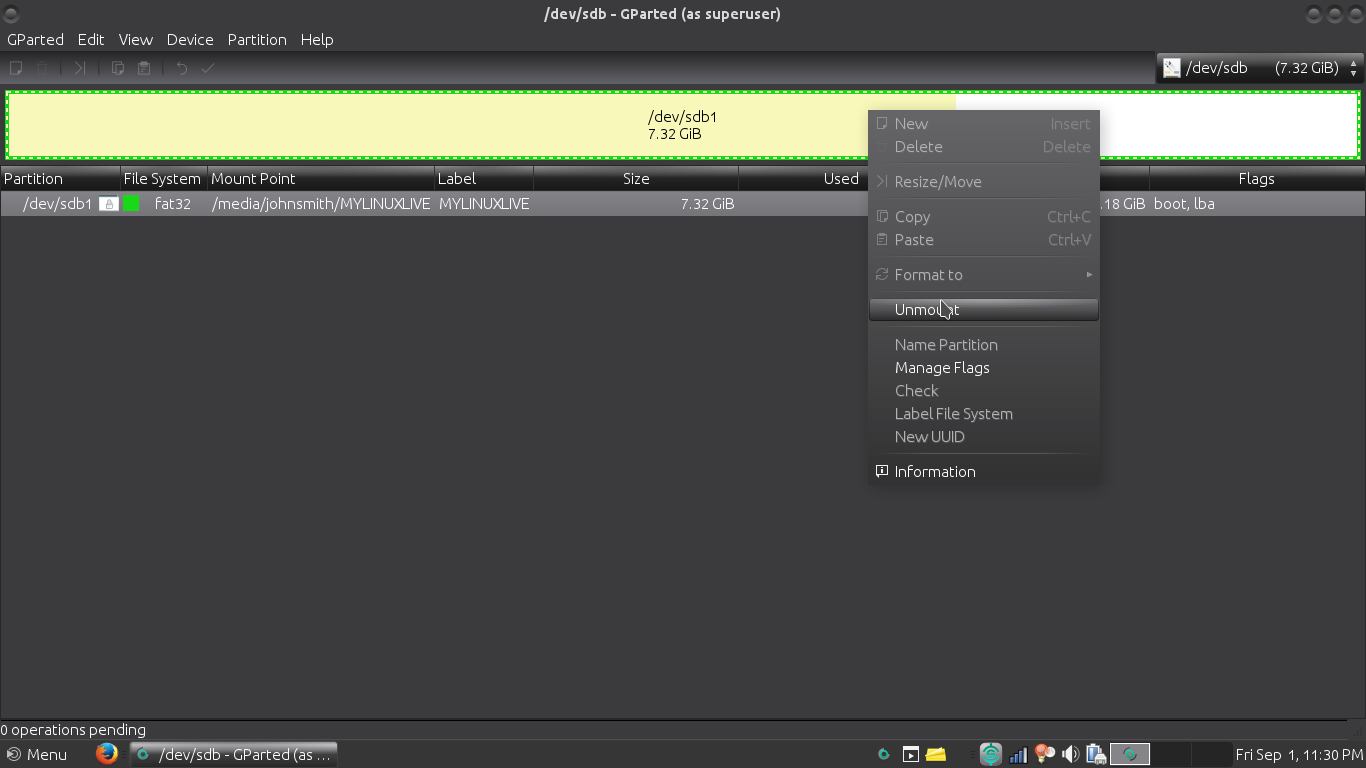
The first thing to do is boot into a copy of Linux other than the one on your new portable Linux drive, and then plug in your persistent USB. On the USB drive, there should be a file called casper-rw; delete it. WARNING: that is where your stored files go on the persistent drive, so backup anything on the portable drive before hand. Next open up (and download) the program GParted (or some alternative). Once in it, select your hard drive and right click on it. You will see the option to unmount; choose it.
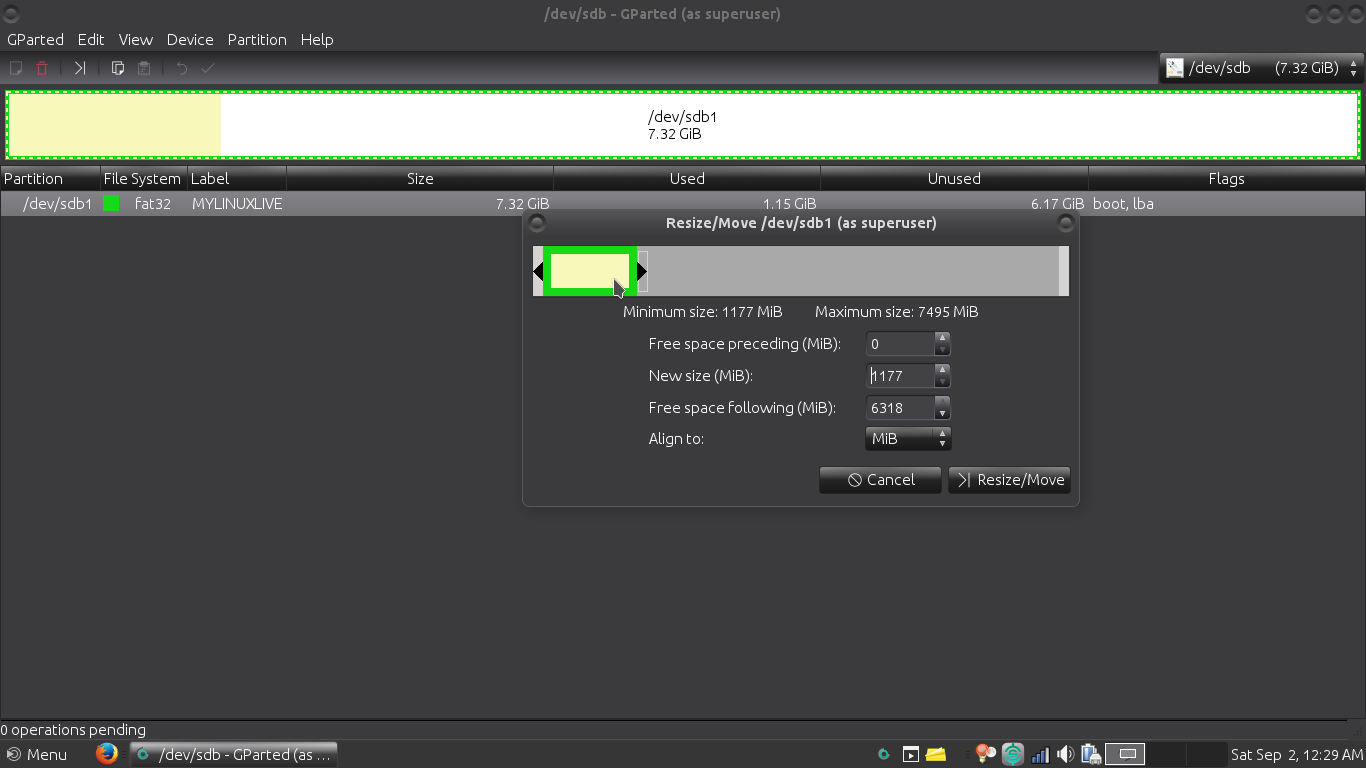
After you unmount, right click again, and click resize. Then resize the partition on your persistent USB drive to the smallest possible size. Also make sure the partition has 0 MiB preceding it, so your new storage partition can use all of the free space.
Now all we have to do is create a new casper-rw partition instead of a file! We will do this by right clicking on the unallocated space and creating a new partition. Set the file system to ext4, and then label it as casper-rw.
Set the new partition to take up all the free space, create it, bam, we are done!
Checking that you use all the available space
To test that you now have all the available space, boot to your newly created and partitioned Linux flash drive. When it finishes booting, go through the setup. This should be very similar to any other OS setup.
Once the setup finishes open a terminal (Ctrl + Alt + T) and type the following command:
df . -h
You will see something like this:
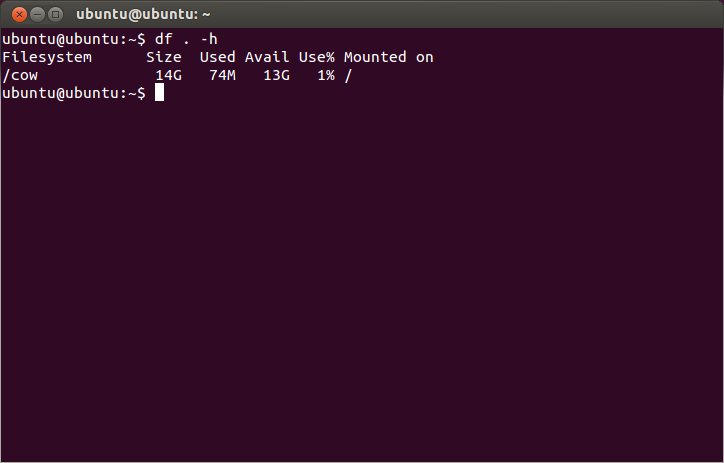
Check that under the Avail column you see a value similar to the available space of the USB. If you still see 4 GB or similar, repeat the partitioning step.
Now boot from your USB and make sure you can still save files. If you can, you are now done and ready to conquer the world with your new Linux powers!